The Colab Interface: Your Workspace
Now that you have a fresh notebook open, let's get familiar with the main areas you'll be interacting with. Don't feel you need to memorize everything at once – we'll focus on the parts you'll use most often.
Interface Overview
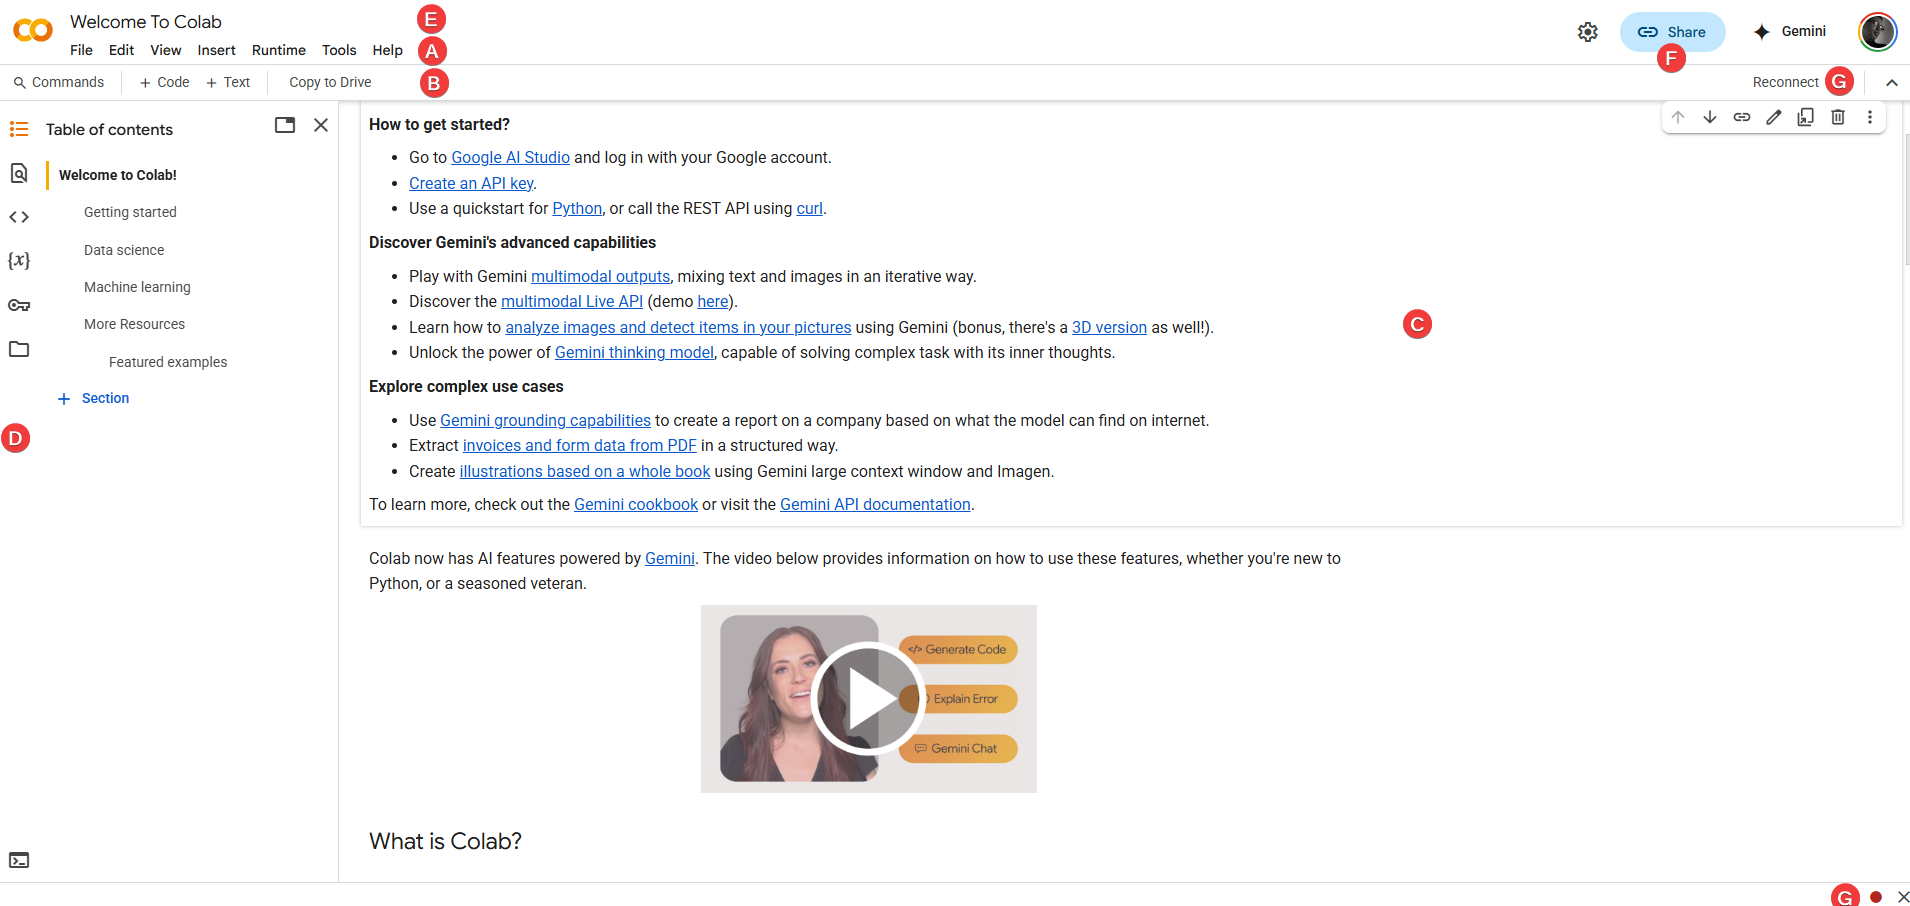
Take a look at your Colab screen. Here are the main parts:
-
Menu Bar(Top: File, Edit, View, Insert, Runtime, Tools, Help - Standard menu options) -
Toolbar(Below Menu: Buttons for common actions like +Code, +Text, file operations, runtime status) -
Main Cell Area(The large central area: This is where you'll write and run your code and text) -
Left Sidebar(Contains tabs for: Table of Contents, Find/Replace, Code Snippets, Secrets, and importantly, the File Browser) -
Notebook Title(Top Left: Where you renamed your notebook) -
Share Button(Top Right: For sharing your notebook with others) -
Runtime Status / Connect Button(Top Right near Share: Shows if you're connected to a runtime and resource usage)
You'll spend most of your time writing in the Main Cell Area (C), using the Toolbar (B) and Menu Bar (A) for actions, and the Left Sidebar (D) for navigation and file management.
Cells: The Building Blocks
The core components of any Jupyter-style notebook, including Colab, are cells. Think of them as individual containers for your content. There are two primary types:
- Code Cells:
- This is where you will write and execute your Python code for data analysis, visualization, and modeling.
- They are usually marked with
[ ]:brackets to their left. When you run the code in the cell, a number will appear in the brackets (like[1]:) indicating the order of execution. (Suggestion: Small screenshot of an empty code cell)
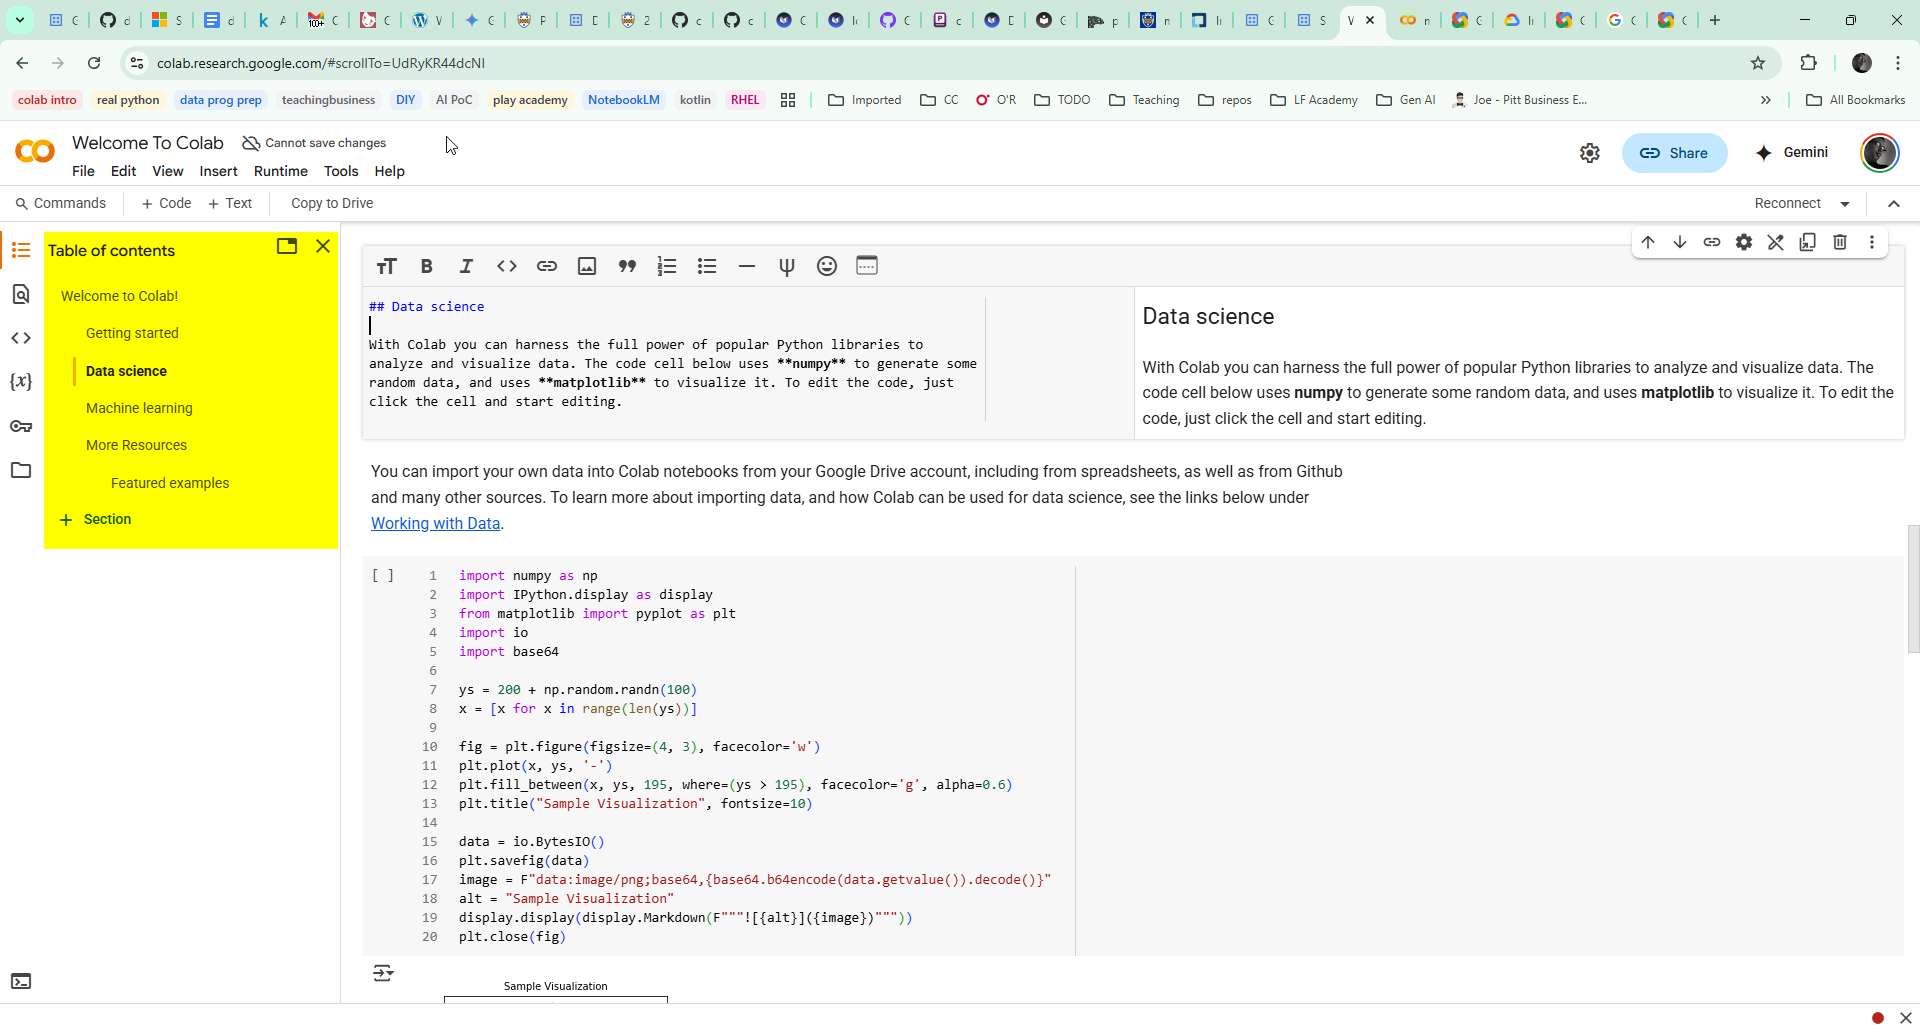
- Text Cells:
- These cells are for writing descriptive text, notes, explanations, section headings, mathematical formulas – essentially, any documentation needed to explain your work.
- They use a simple formatting syntax called Markdown. When you "run" a text cell, Colab renders the Markdown into nicely formatted text (bold, italics, lists, headings, etc.). We'll look closer at Markdown in section 2.5. (Suggestion: Small screenshot of a text cell with some Markdown source, and another showing the rendered output)
Switching Between Cell Types: You can easily change a cell from Code to Text or vice-versa. When a cell is selected (you'll see a border around it), you can use the command pallette or keyboard shortcuts
Note
- To invoke commands via keyboard shortcuts, you need to press the prefix combo before the key for the command.
- The prefix combo in Windows/Linux/ChromeOS is Ctrl+M and in MacOS it is Cmd+M
- To turn a cell into a markdown/text cell press prefixthen M.
- To turn a cell into a code cell press prefix then Y.
- You can review all keyboard shortcuts available by pressing prefix then H.
Running Cells: Bringing Notebooks to Life
Simply typing in a cell doesn't do anything until you run (or execute) it. Here are the most common ways to run the currently selected cell:
- Shift + Enter
- Executes the current cell and automatically selects the next cell below it. If you're at the last cell, it often creates a new code cell. Use this to flow through your notebook.
- Ctrl + Enter on Windows and Linux / Cmd + Enter on MacOS
- Executes the current cell but keeps the focus on the same cell. Useful if you want to re-run the same code multiple times quickly.
- Alt + Enter / Option + Enter
- Executes the current cell and inserts a brand new code cell immediately below it. Handy for adding quick tests or explorations.
- Play Icon
- When you hover your mouse pointer to the left of a code cell, a circular 'play' button icon appears. Clicking this runs only that specific cell. (Suggestion: Small screenshot showing the Play icon next to a code cell)
What happens when you run a cell?
- Code Cell: The Python code is executed by the Colab backend (the "Kernel"). Any output generated by the code (e.g., from
print()statements, calculation results, error messages) will appear directly beneath the cell. The execution counter in the[ ]:brackets gets updated. - Text Cell: The Markdown text is rendered into formatted output, making it readable.
The Cell Toolbar: Quick Actions
When you select a cell, or sometimes just hover over it, a small toolbar usually appears (often in the top right corner of the cell). This provides handy shortcuts for common actions:

Look for icons like:
- Arrows (Up/Down): To move the selected cell up or down in the notebook sequence.
- Trash Can: To delete the current cell (use with caution!).
- Link Icon: To get a direct URL link to that specific cell.
- ✨ Gemini/AI Icons: Buttons to access integrated AI assistance for generating code, explaining concepts, etc. (More on this in Section 5!).
- Three Dots ('More actions'): Often reveals other options like clearing the output of a cell.
Get comfortable using this toolbar! It's often faster than navigating the main menus for these frequent tasks.
Staying Organized: Text Cells are Key!
As your analyses become more involved, your notebooks can get quite long. Effective organization is essential for making them understandable. Text cells and Markdown are your best friends here.
Use Markdown for Structure: Markdown allows you to easily format your text cells. Some essentials:
# Heading 1(Largest heading - use for main titles/sections)## Heading 2(For sub-sections)### Heading 3(For smaller points)- Use
*asterisks*or_underscores_for italics. - Use
**double asterisks**or__double underscores__for bold text. - Start lines with
-or*for bullet points. - Start lines with
1.,2., etc., for numbered lists.
Note
Review this Markdown Guide from Google for a bite-sized tutorial and a list of references on this topic.
Leverage the Table of Contents: Colab automatically creates a navigable Table of Contents based on the Markdown headings in your text cells.
- Find the Table of Contents icon (usually looks like three horizontal lines or a bulleted list) in the Left Sidebar. Click it.
- A pane will appear showing your headings, nested according to their level (
#,##, etc.). - Click any heading in this pane to jump directly to that section of your notebook. This is incredibly useful for navigation!
Recommendation: Make it a habit to use Markdown headings (#, ##) to structure all your notebooks (labs, projects). It dramatically improves readability and navigation for yourself and anyone you share your work with.