Colab: Your Coding Environment
Welcome to the world of data programming! Before we dive into Python itself, let's get familiar with the main tool we'll be using throughout this course: Google Colaboratory, or Colab. Think of it as your digital workbench for all things data science in this class.
Why Use an IDE?
Imagine you're trying to build something complex, maybe assemble furniture or cook a gourmet meal. You could try to do it with just a few basic, separate tools scattered around. But isn't it much easier if you have a dedicated workshop or a well-organized kitchen with everything you need integrated and within reach?
An IDE, which stands for Integrated Development Environment, is like that well-equipped workshop, but for writing computer code. It brings together all the essential tools you need into one convenient place, making the process of writing, testing, and fixing code much smoother. Typically, an IDE provides:
- A specialized editor for writing your code (often with helpful features like syntax highlighting to make code more readable).
- A way to run or execute your code and see the results immediately.
- Tools to help organize your files and project components.
- Features to help you find and fix errors in your code (known as debugging).
Using an IDE helps you be more productive and focus on the logic of your analysis, rather than fighting with basic tools. For this course, Google Colab will be our IDE, specifically tailored for working with data in Python.
Aside: The "Studio" Connection
That idea of an IDE being a programmer's "workshop" or creative "studio" isn't just an analogy we're using – it's reflected right in the names of many widely-used development tools! You might recognize names like:
- Visual Studio and Visual Studio Code (from Microsoft, for various types of software development)
- Android Studio (from Google, for building Android mobile apps)
- RStudio (very popular in data science for working with the R programming language)
The "Studio" name emphasizes that these are integrated environments designed for focused, productive coding work, bringing all the necessary tools together in one place.
What are Jupyter Notebooks?
Google Colab is built upon a popular open-source project called Jupyter. So, what's a Jupyter Notebook?
Imagine a digital document that's more dynamic than a standard text file. In a Jupyter Notebook (which typically has an .ipynb file extension), you can combine:
- Live, runnable Python code.
- The output from running that code (like calculations, tables of data, or messages).
- Formatted text for explanations, notes, and documentation (using a simple language called Markdown).
- Mathematical equations.
- Interactive visualizations like charts and graphs.
This combination makes Jupyter Notebooks incredibly powerful for data science because they allow you to:
- Explore data interactively: Write a small piece of code, run it, see the result, tweak the code, and run it again, all within the same document.
- Explain your work: Document your thought process, methodology, and findings right alongside the code that produced them. This creates a clear narrative of your analysis.
- Share your results effectively: Package your entire workflow – code, outputs, visuals, and explanations – into a single file that others can easily view and even run themselves.
Think of a Jupyter Notebook as a computational story – you're not just writing code; you're documenting your entire analysis journey.
Google Colab: Jupyter in the Cloud
Now, where does Google Colab fit in? Colab is essentially Google's hosted version of the Jupyter Notebook environment, accessible entirely through your web browser.
Here's why it's our choice for this course:
- Zero Setup Required: This is a huge advantage! You don't need to install Python or any complex software on your own computer. As long as you have a web browser and a Google account, you're ready to go.
- Free Access: Colab provides free access to computing resources, including Python environments with many essential data science libraries (like Polars, Altair, and Scikit-learn, which we'll use) pre-installed or easily installable.
- Seamless Google Drive Integration: Your Colab notebooks are automatically saved to your Google Drive. You can also easily access data files stored in your Drive directly from your Colab notebooks (we'll cover how later!).
- Easy Collaboration & Sharing: Just like Google Docs or Sheets, you can easily share your Colab notebooks with others for viewing, commenting, or editing.
In short, Colab provides a powerful, accessible, and hassle-free platform for us to learn and apply data programming techniques using Python.
Getting Started: Accessing Colab
Ready to open your first notebook? It's simple:
- You Need a Google Account: Since Colab integrates with Google Drive, you must be logged into a Google account (this could be a personal Gmail account or a Google Workspace account).
- Go to the Colab Website: Open your preferred web browser and navigate to this URL: https://colab.research.google.com
-
Create a New Notebook:
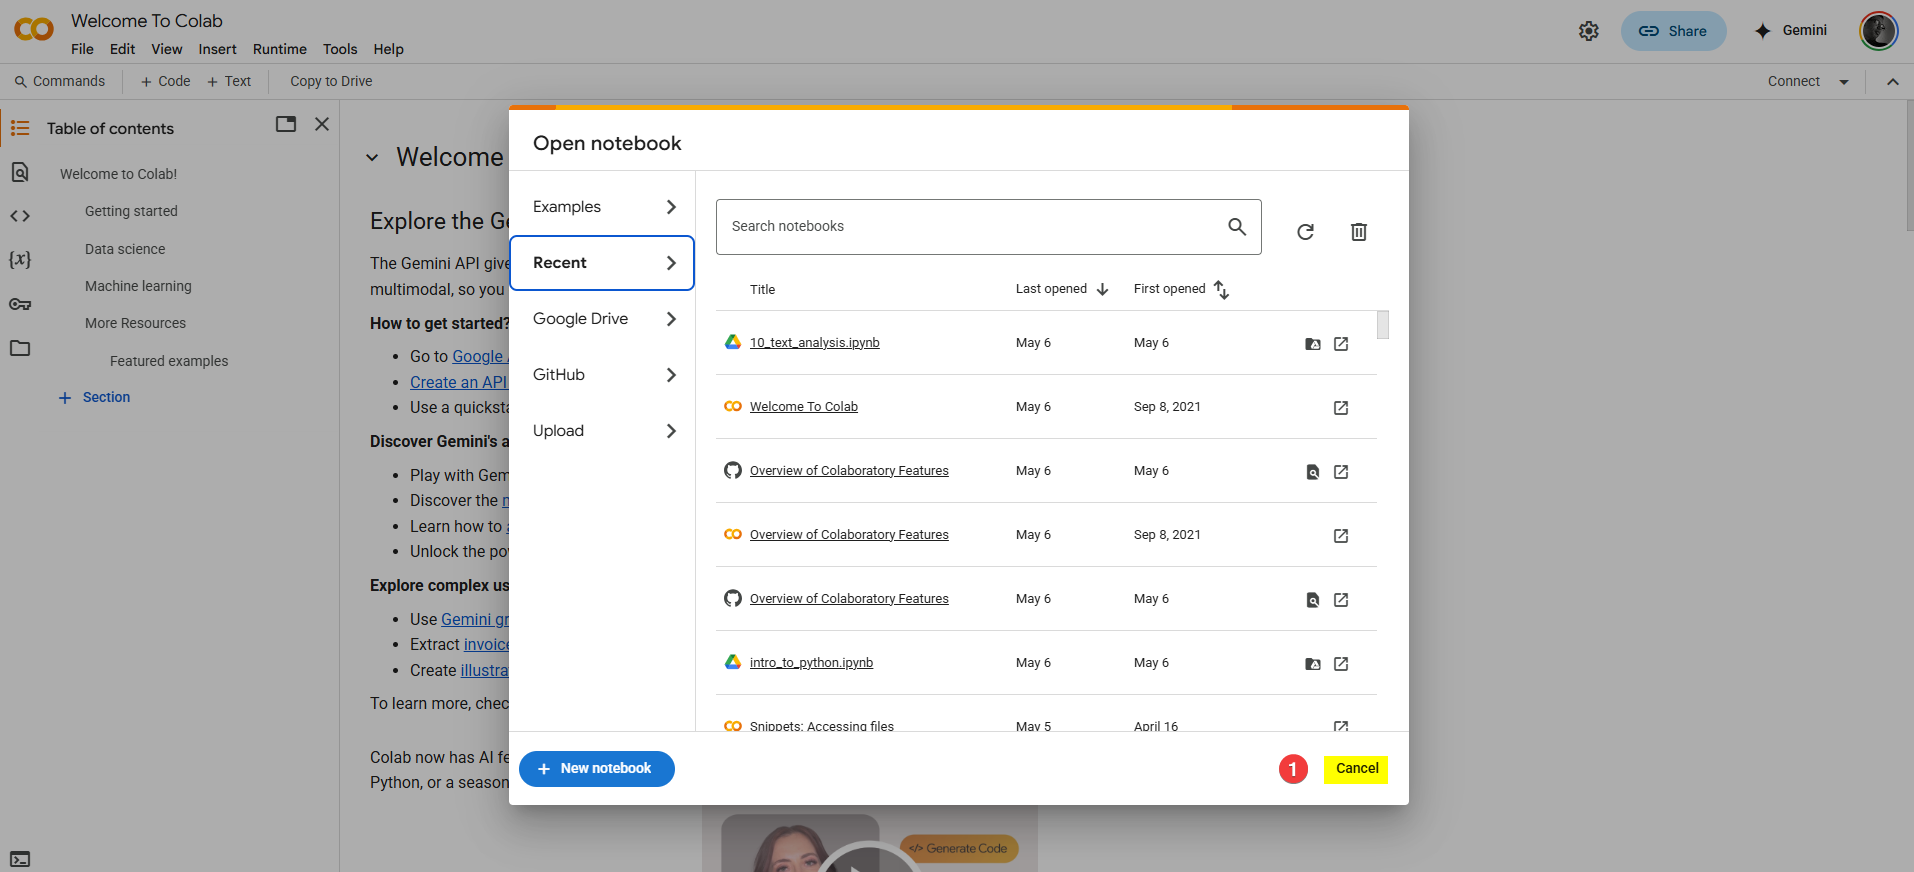
- You might see a welcome pop-up window with options like viewing recent notebooks or examples. You can simply close this for now by clicking
CANCELor the 'X'.
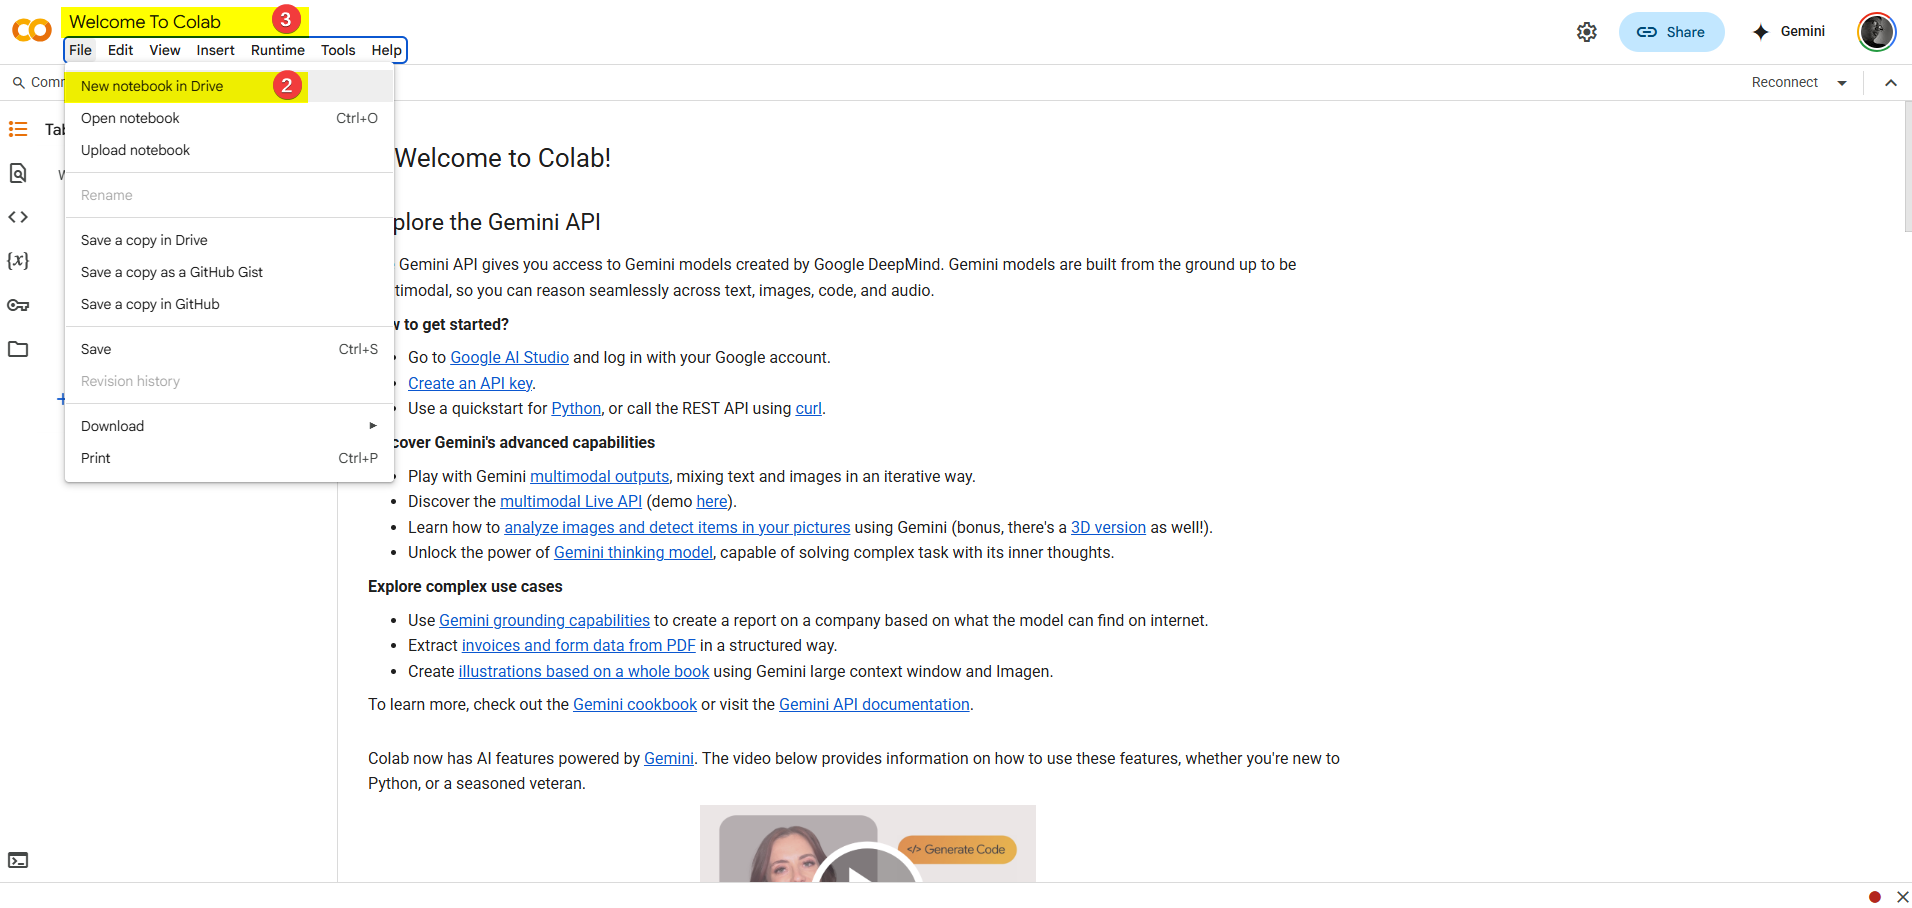
- From the menu bar at the top, click File -> New notebook in Drive.
- You might see a welcome pop-up window with options like viewing recent notebooks or examples. You can simply close this for now by clicking
-
Name Your Notebook:
- The notebook will open with a default title like
Untitled0.ipynbat the very top left of the page. - Click directly on this title. A rename dialog will appear. Change the name to something descriptive, like
MyFirstColabNotebook.ipynborW1_Colab_Intro.ipynb, and press Enter.
- The notebook will open with a default title like
Success! You've just created your first Colab notebook. It's automatically saved in a folder named "Colab Notebooks" within your Google Drive. You're now looking at the Colab interface, ready for the next step.