Working with Data & Files
Data analysis naturally starts with data! A common first step is loading data from files (like CSVs, Excel files, etc.) into your programming environment. Colab provides two primary ways to access files within your notebook session. Understanding the difference is key to managing your data effectively.
Colab Storage Explained
-
Session Storage (Temporary):
- Think of this as a small, temporary hard drive attached to your Colab notebook only while it's actively running.
- Pros: Very easy to quickly upload files directly from your computer.
- Cons: This storage is ephemeral. When your Colab session ends (because you close the tab for an extended period, the connection times out after inactivity, or you manually restart the runtime), this storage is completely wiped, and any files you uploaded directly will be gone.
- Best Use: Small files needed only for the current working session, quick tests.
-
Google Drive (Persistent):
- You can connect ("mount") your personal Google Drive account directly to your Colab session.
- Pros: Files stored in your Google Drive persist across sessions. This is the standard way to work with datasets you'll reuse, larger files, or any work you want to save reliably. It also allows Colab notebooks to read and write files back to your Drive.
- Cons: Requires a brief authorization step each time you start a new session.
- Best Use: Almost all course datasets, project files, any data you need to access repeatedly. This is the recommended method for most work in this course.
Let's explore how to use each method.
Session Storage
Method 1: Uploading to Session Storage (Temporary Use)
This is suitable for a quick, one-time analysis of a small file.
How-to:
-
In the Left Sidebar, click the Folder icon to open the File Browser.
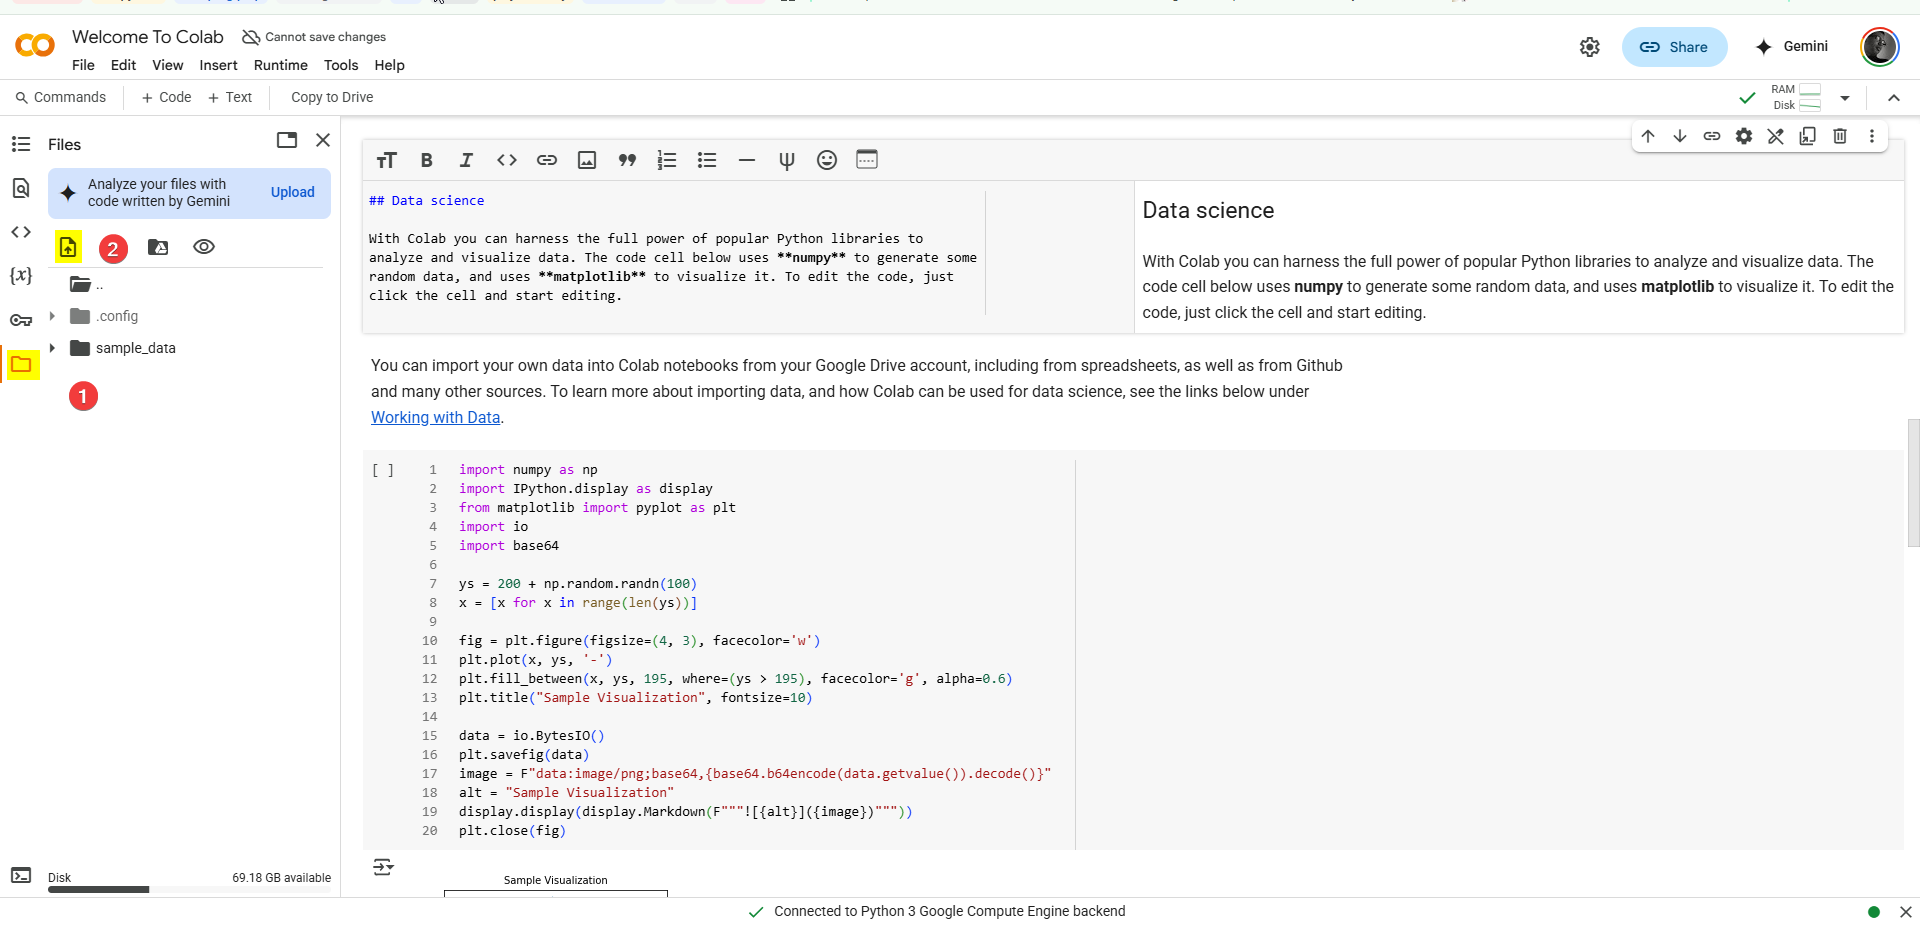
-
At the top of the File Browser pane that appears, click the "Upload to session storage" button . It usually looks like a page icon with an arrow pointing upwards.
-
A file selection dialog from your operating system will open. Navigate to the desired file on your local computer (e.g.,
sample_data.csv) and select it .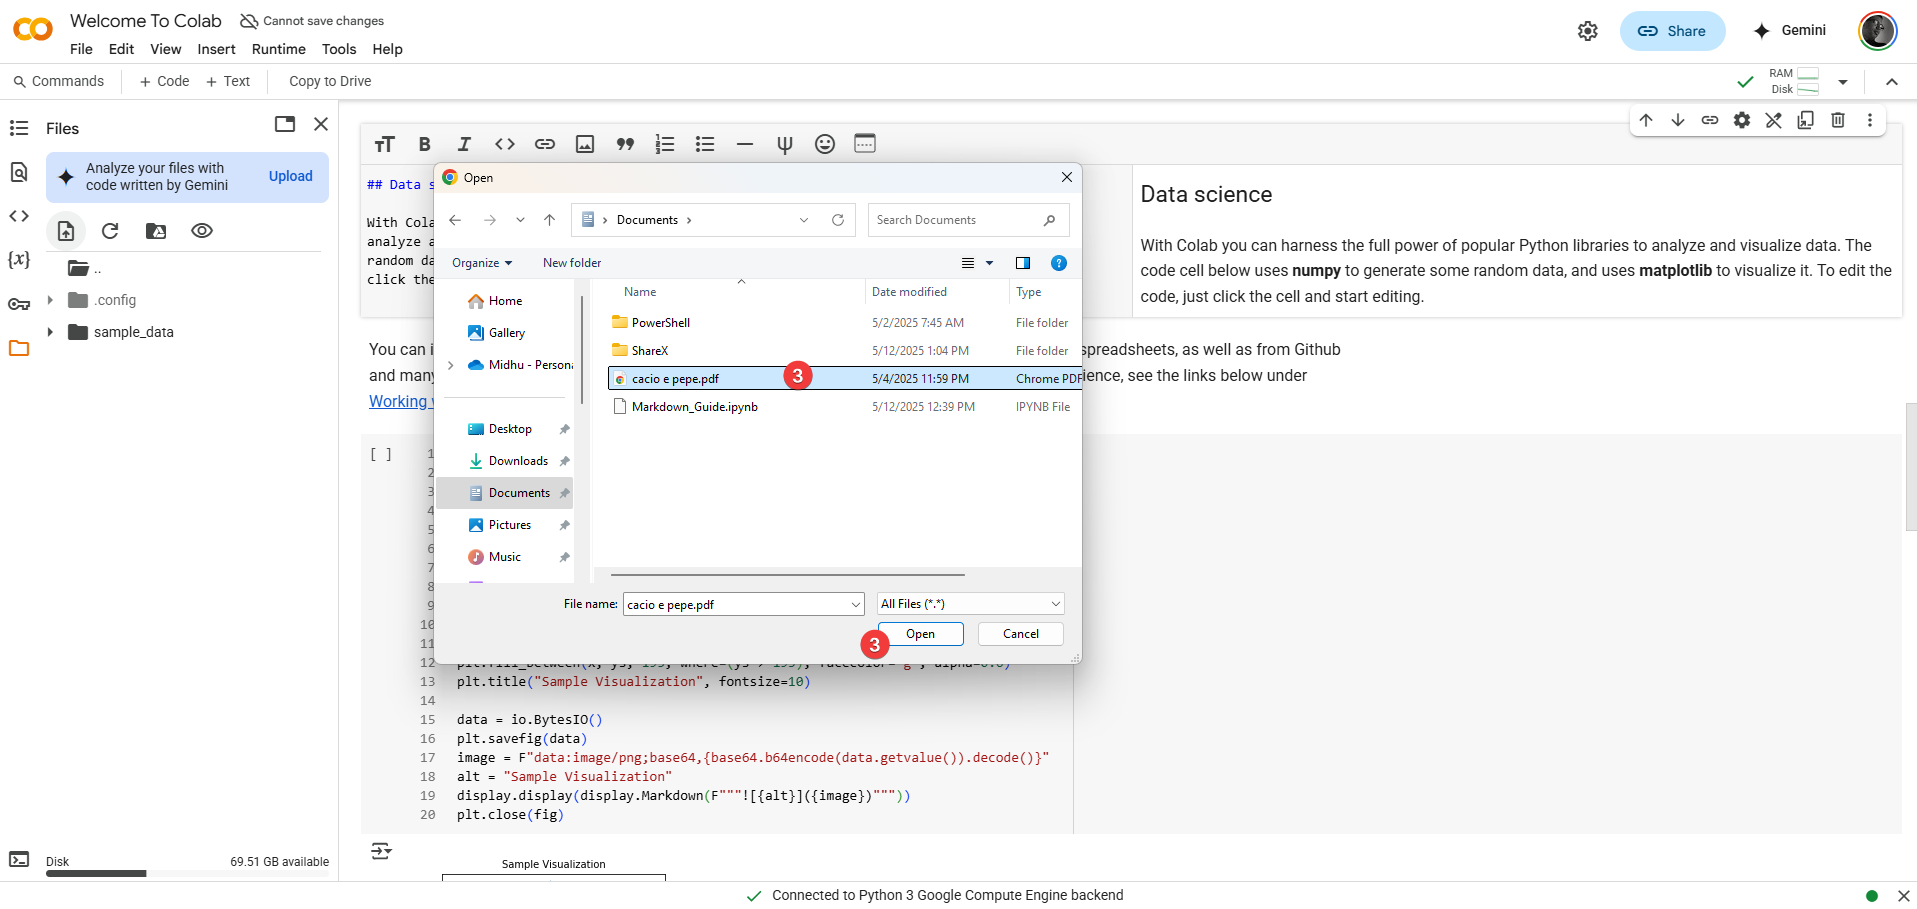
-
The file will be uploaded to Colab's temporary environment, and you should see its name appear in the File Browser list . Upload speed depends on the file size and your internet connection.
Accessing the File in Code: Once uploaded to session storage, you typically refer to the file in your Python code using just its filename as the path, because it's in the "root" directory of this temporary environment.
# Example using Polars (syntax details covered later)
import polars as pl

try:
  df_temp = pl.read_csv('sample_data.csv')
  print("Successfully read from session storage:")
  print(df_temp.head(3))
except Exception as e:
  print(f"Error reading file: {e}")
  print("Did you upload 'sample_data.csv' using the File Browser?")
Crucial Reminder: Remember, this storage is temporary. If you restart your runtime or close the notebook for too long, sample_data.csv will disappear, and the code above would fail.
Persistent Storage
Method 2: Mounting Google Drive (Recommended)
This is the standard and most reliable way to work with your data files for this course.
How-to (Mounting Your Drive):
-
Add a new code cell to your notebook if you don't have one ready .
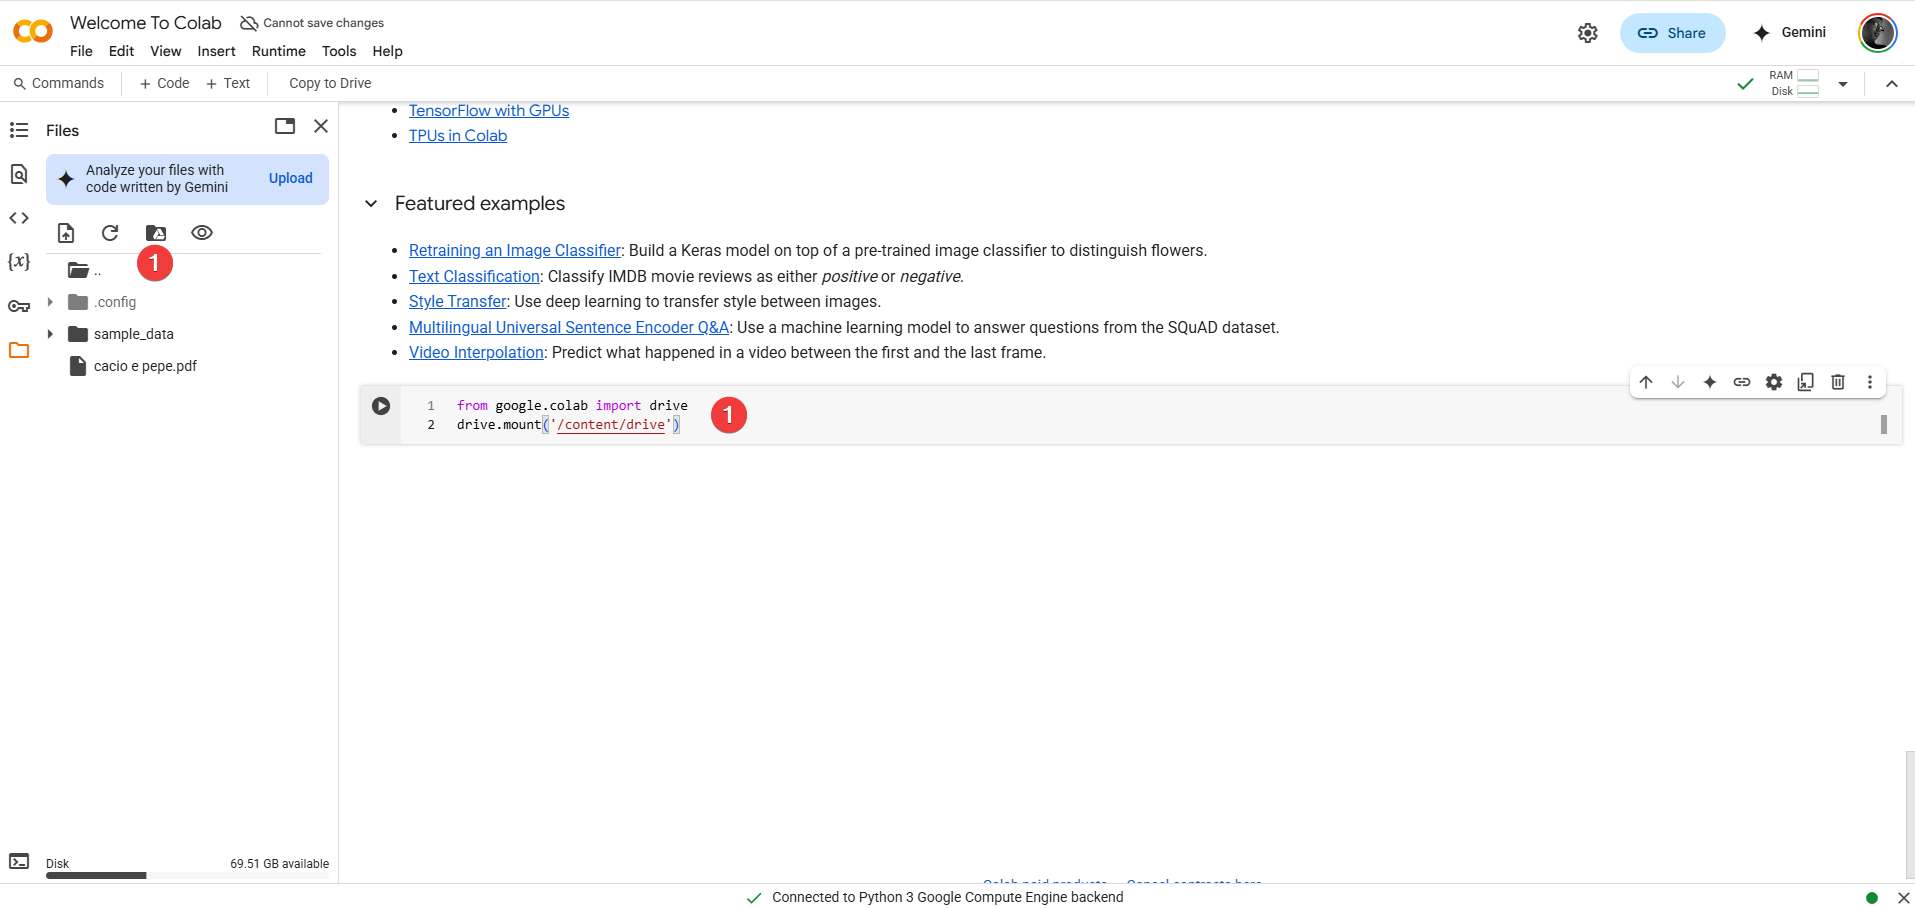
-
Enter the following exact Python code snippet into the cell:
-
Run this code cell (e.g., Shift+Enter).
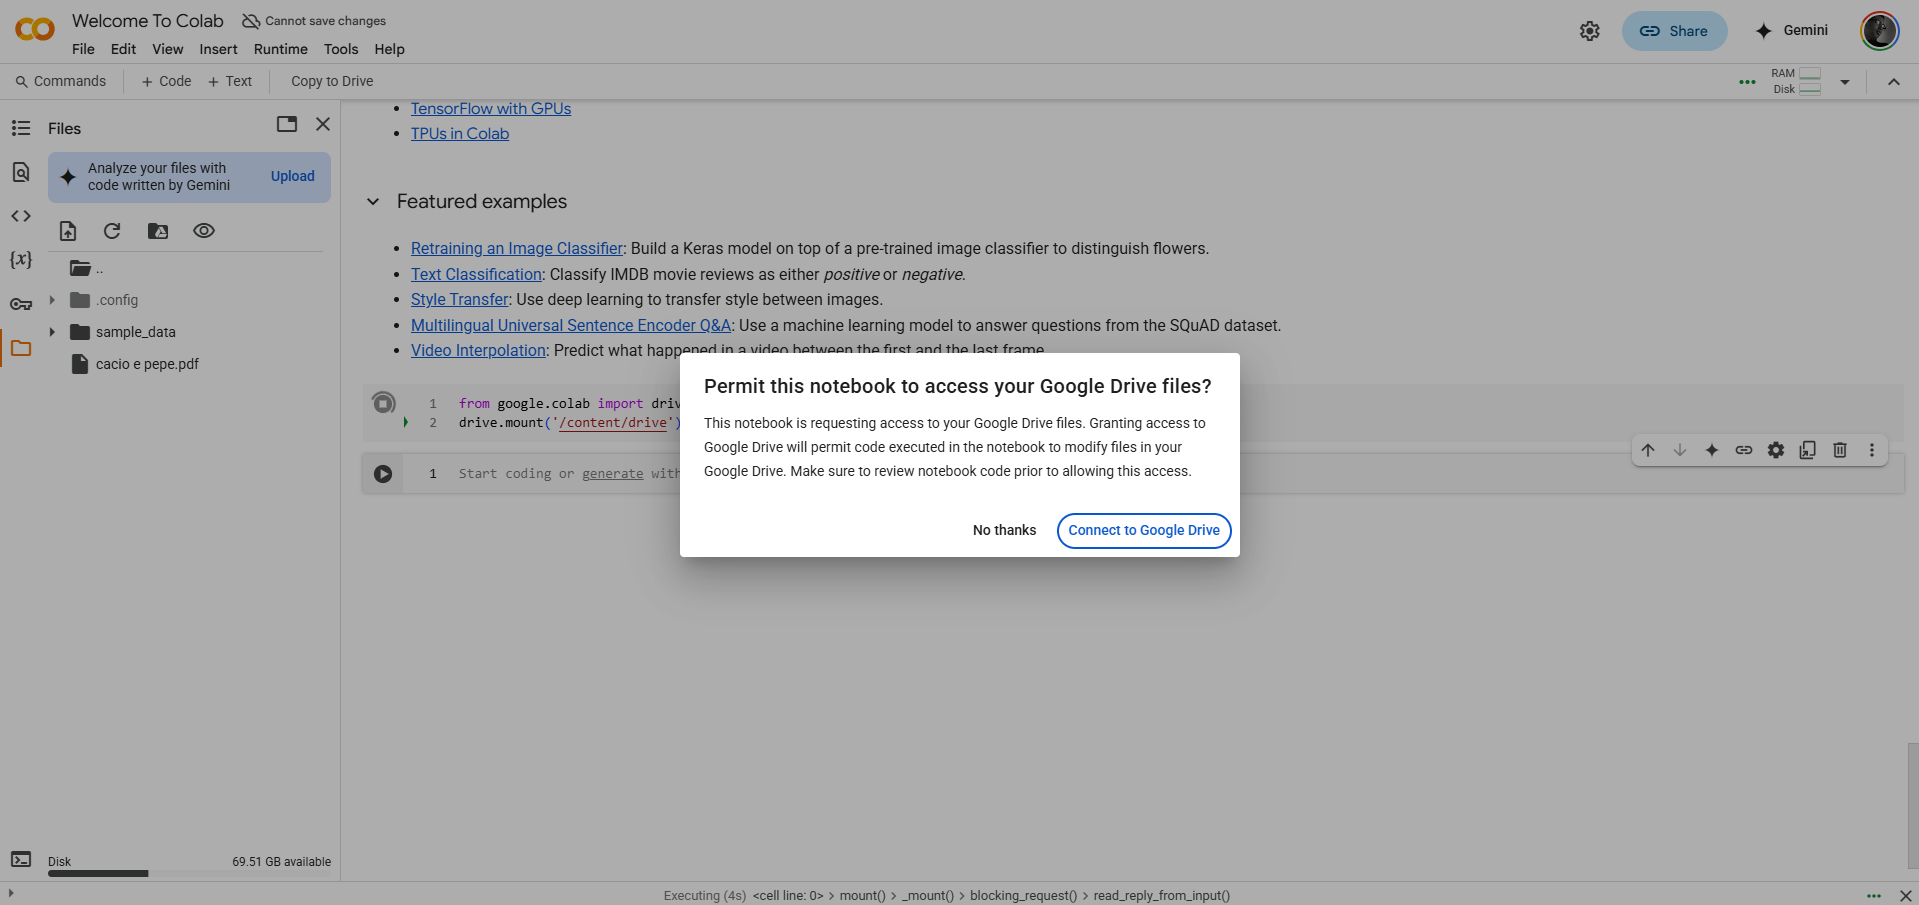
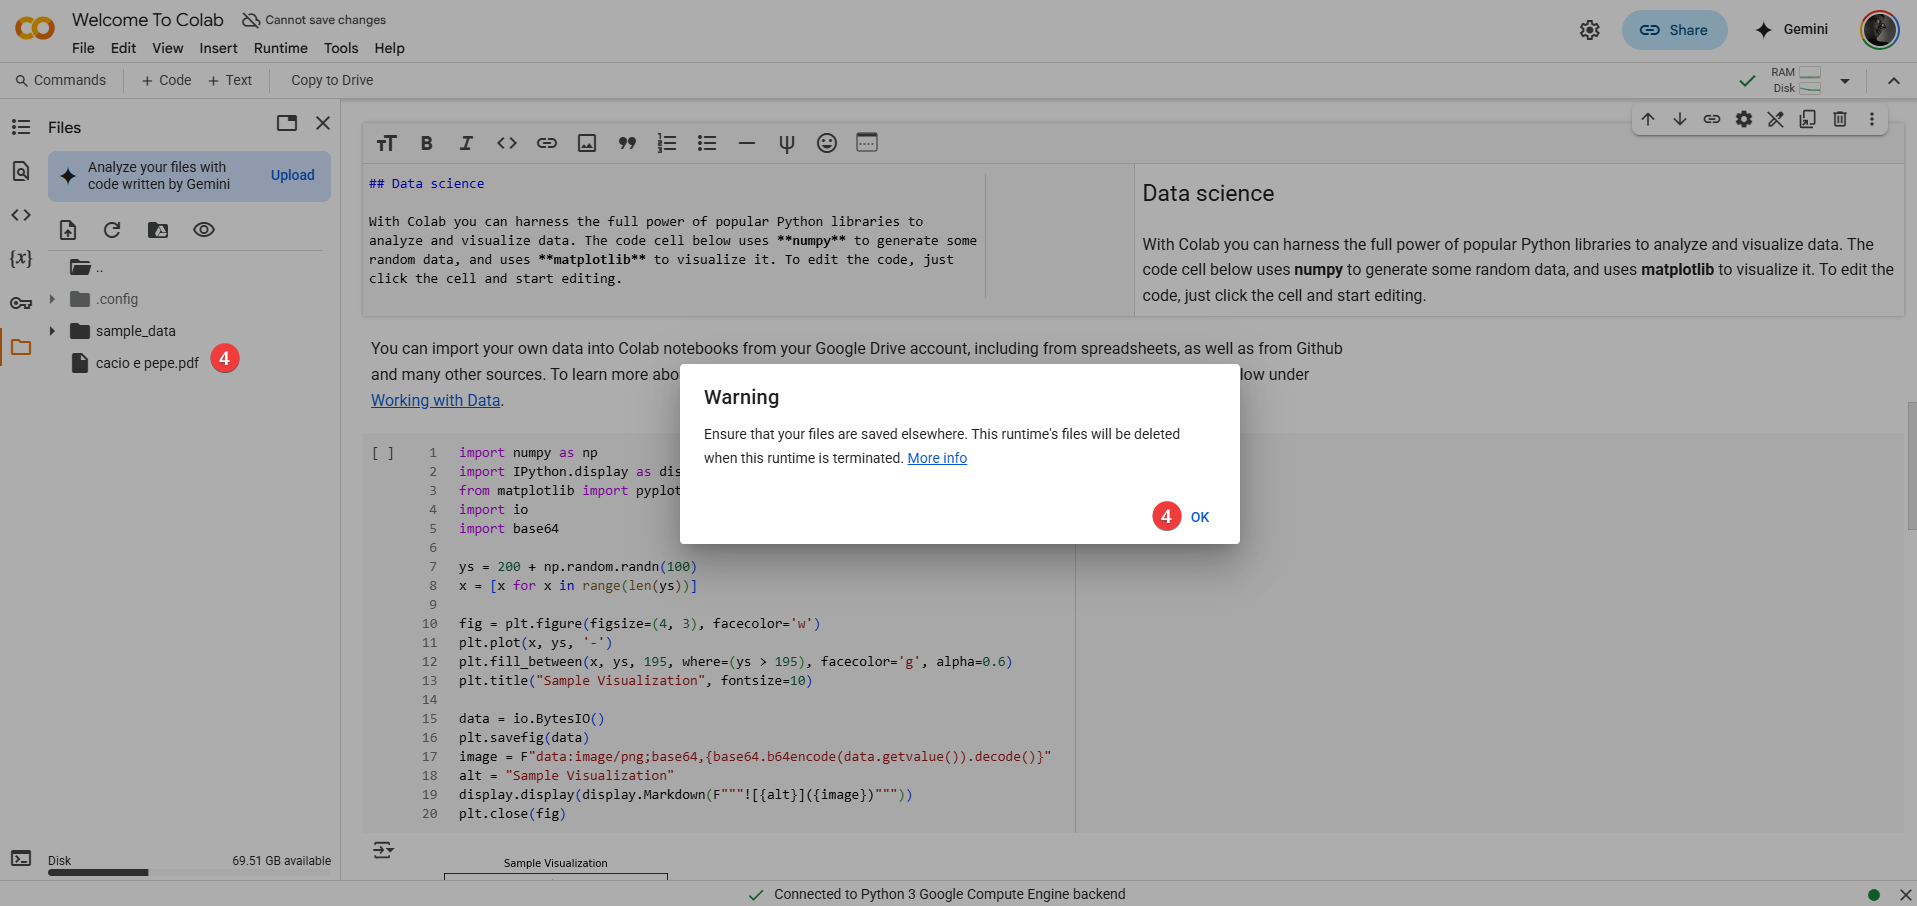
Warning
Authorization process is dynamic and sensitive to security settings on your Google profile, personal computer, and the browser. Most likely the instructions here may not match what you see. Follow the instructions on your screen closely. If you have trouble completing the task, please reach out.
-
Authorization Process: The first time you run this in a new session, Colab needs your permission to access your Google Drive. The cell's output will display:
- A URL (e.g.,
https://accounts.google.com/o/oauth2/auth?...). - An input box prompting for an
Authorization code. - Follow these steps:
- Click the URL. A new browser tab will open.
- Choose the Google Account associated with the Google Drive you want to use (likely the same one you use for Colab).
- Review the permissions Colab is requesting (it needs access to view/manage files it interacts with) and click "Allow" or "Permit".
- Google will provide you with a long authorization code. Copy this entire code.
- Switch back to your Colab notebook tab.
- Paste the copied code into the input box in the cell's output area.
- Press Enter.
- A URL (e.g.,
- Confirmation: After a few moments, you should see the output
Mounted at /content/drive. - Verify in File Browser: Check the File Browser pane again (Folder icon). A new folder named
driveshould now be visible . If you expand it, you'll seeMyDrive, which represents the root folder of your connected Google Drive.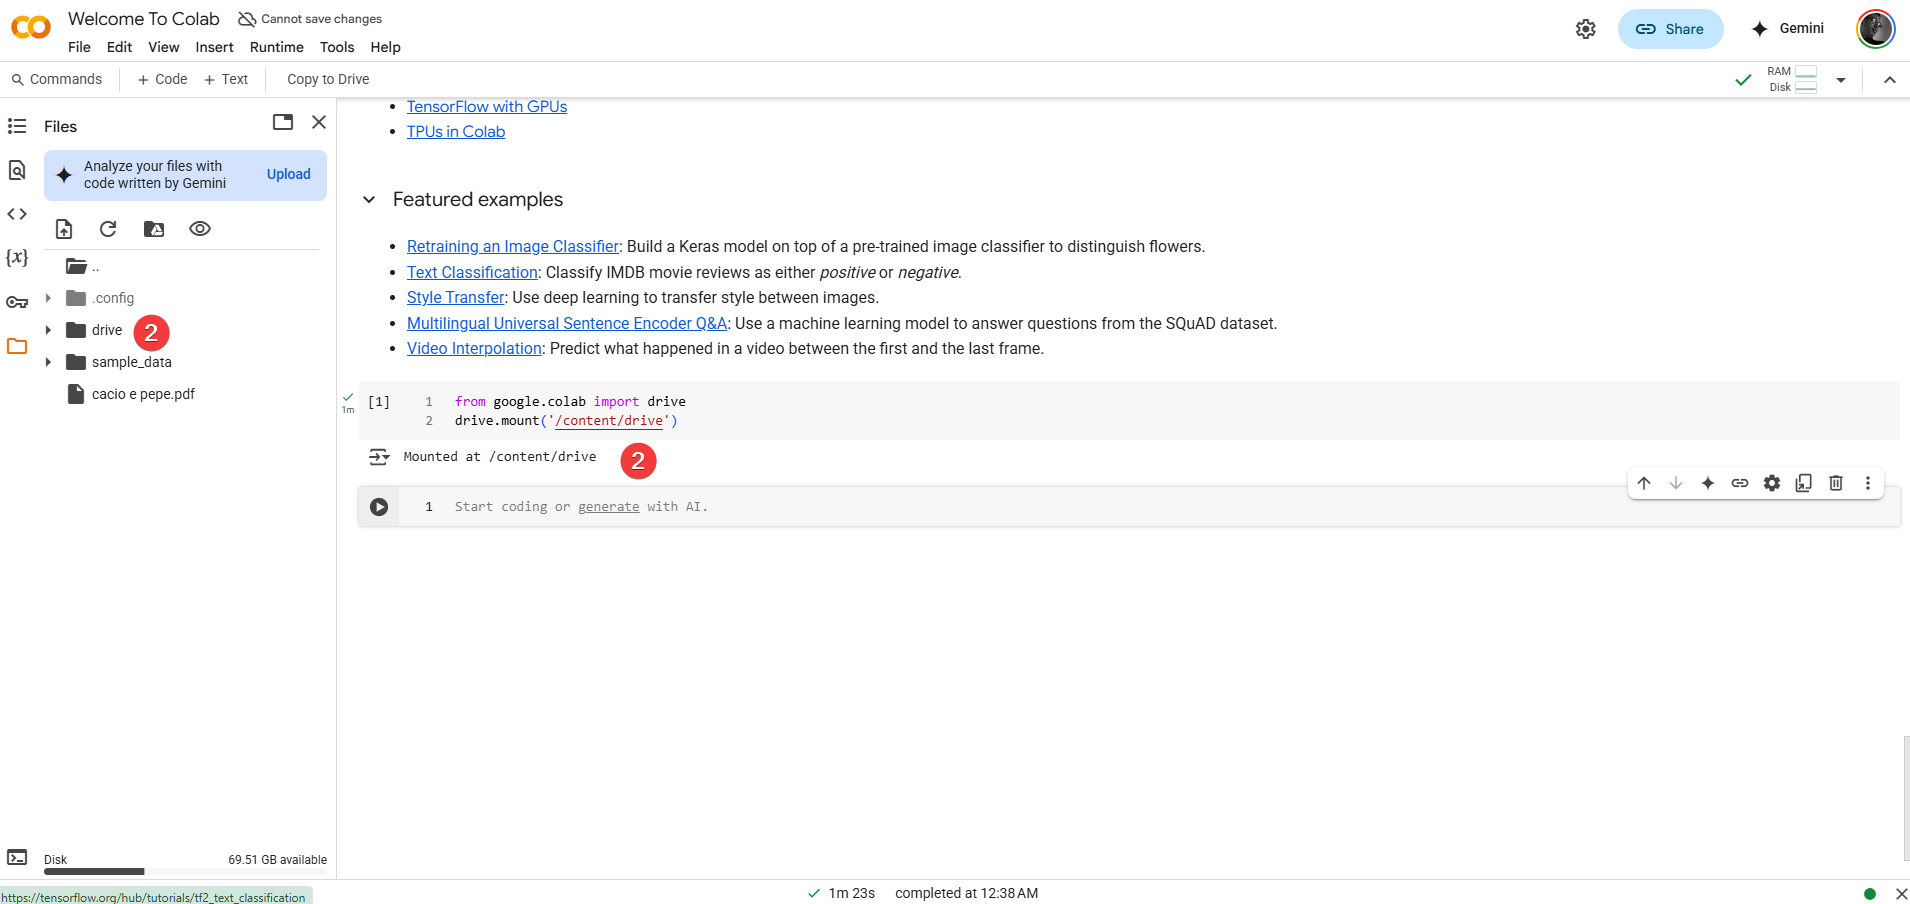
Accessing Files in Code:
Files within your mounted Google Drive are accessed via paths that always start with /content/drive/MyDrive/.
- If you have a file
my_course_data.csvdirectly in your Google Drive's main ("My Drive") area, the path is:/content/drive/MyDrive/my_course_data.csv - If you created a folder named
Data Coursein your Drive and put the file inside that folder, the path is:/content/drive/MyDrive/Data Course/my_course_data.csv
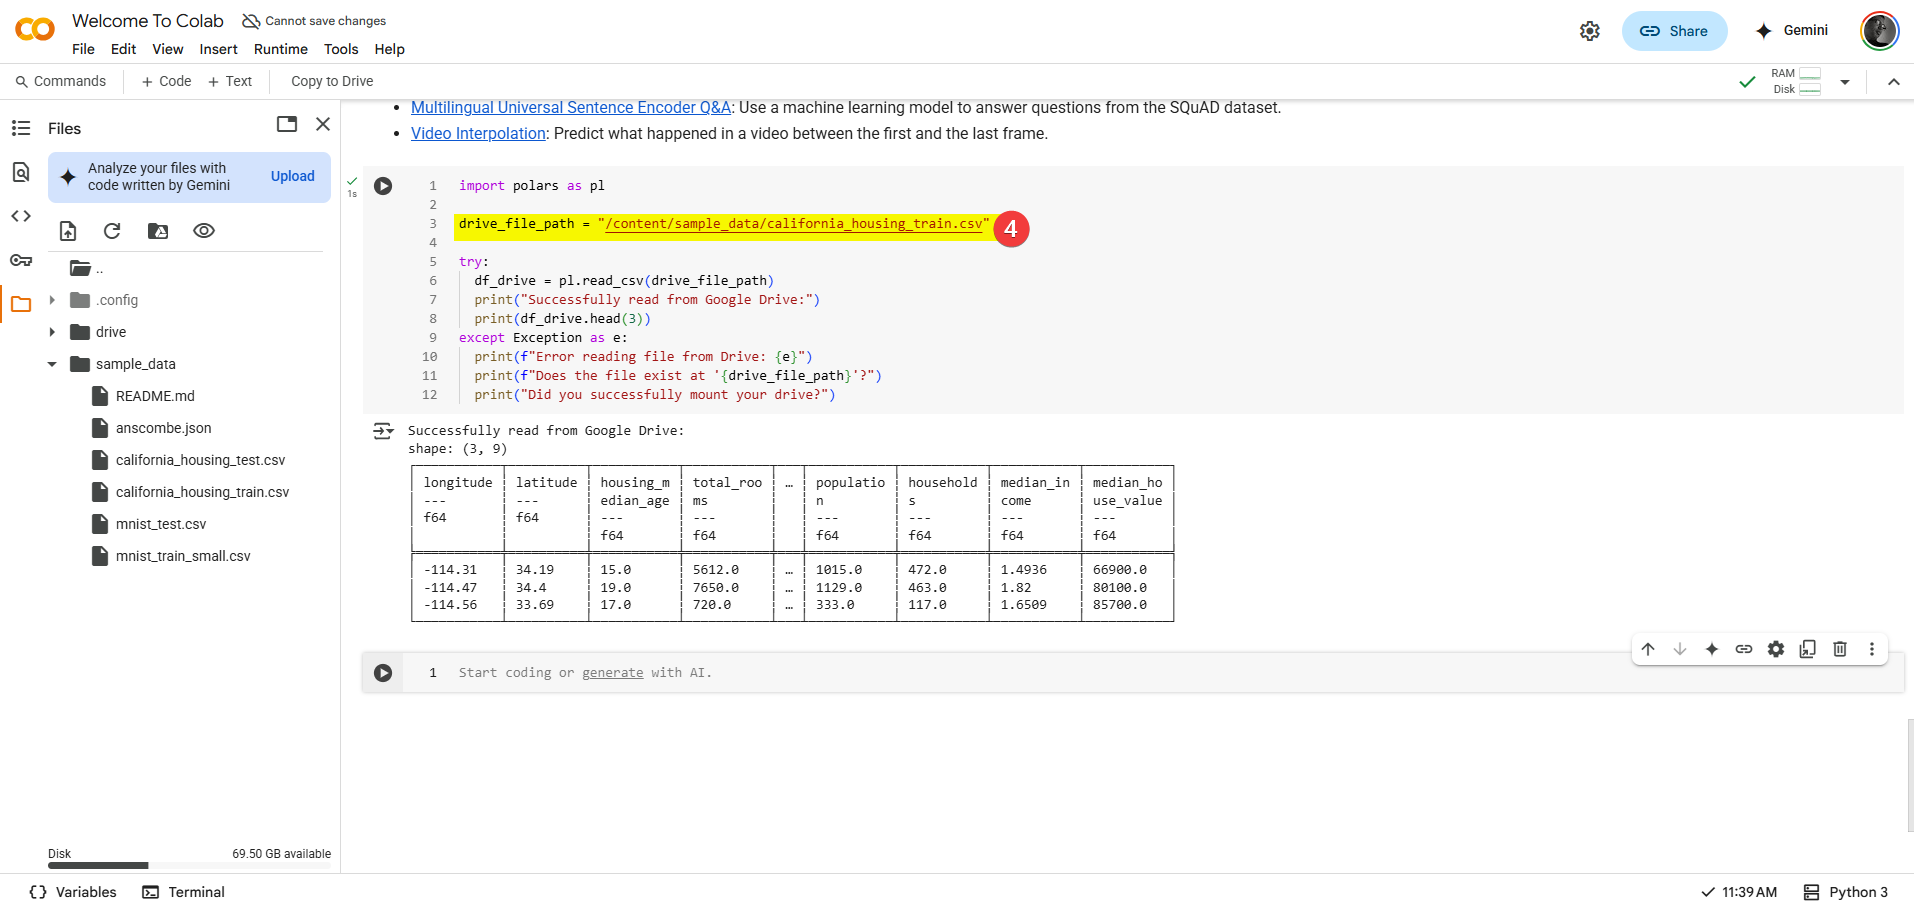
# Example path within a 'Data Course' folder in Drive
drive_file_path = '/content/drive/MyDrive/Data Course/my_course_data.csv'

# Example using Polars
import polars as pl

try:
  df_drive = pl.read_csv(drive_file_path)
  print("Successfully read from Google Drive:")
  print(df_drive.head(3))
except Exception as e:
  print(f"Error reading file from Drive: {e}")
  print(f"Does the file exist at '{drive_file_path}'?")
  print("Did you successfully mount your drive?")
Key Benefit: Files accessed this way are durable. They reside in your Google Drive and will be available whenever you reconnect your Drive in future Colab sessions (you do need to re-run the drive.mount() cell in each new session).
Recommendation: To stay organized, create a specific folder in your main Google Drive (e.g., Data_Programming_Essentials) and store all your course-related notebooks and datasets within it.
Navigating and Getting File Paths
Whether using session storage or mounted Drive, the File Browser pane (Folder icon) lets you visually navigate folders. Typing long paths, especially Drive paths, is tedious and error-prone. Use this shortcut:
-
In the File Browser, navigate to the file you need .
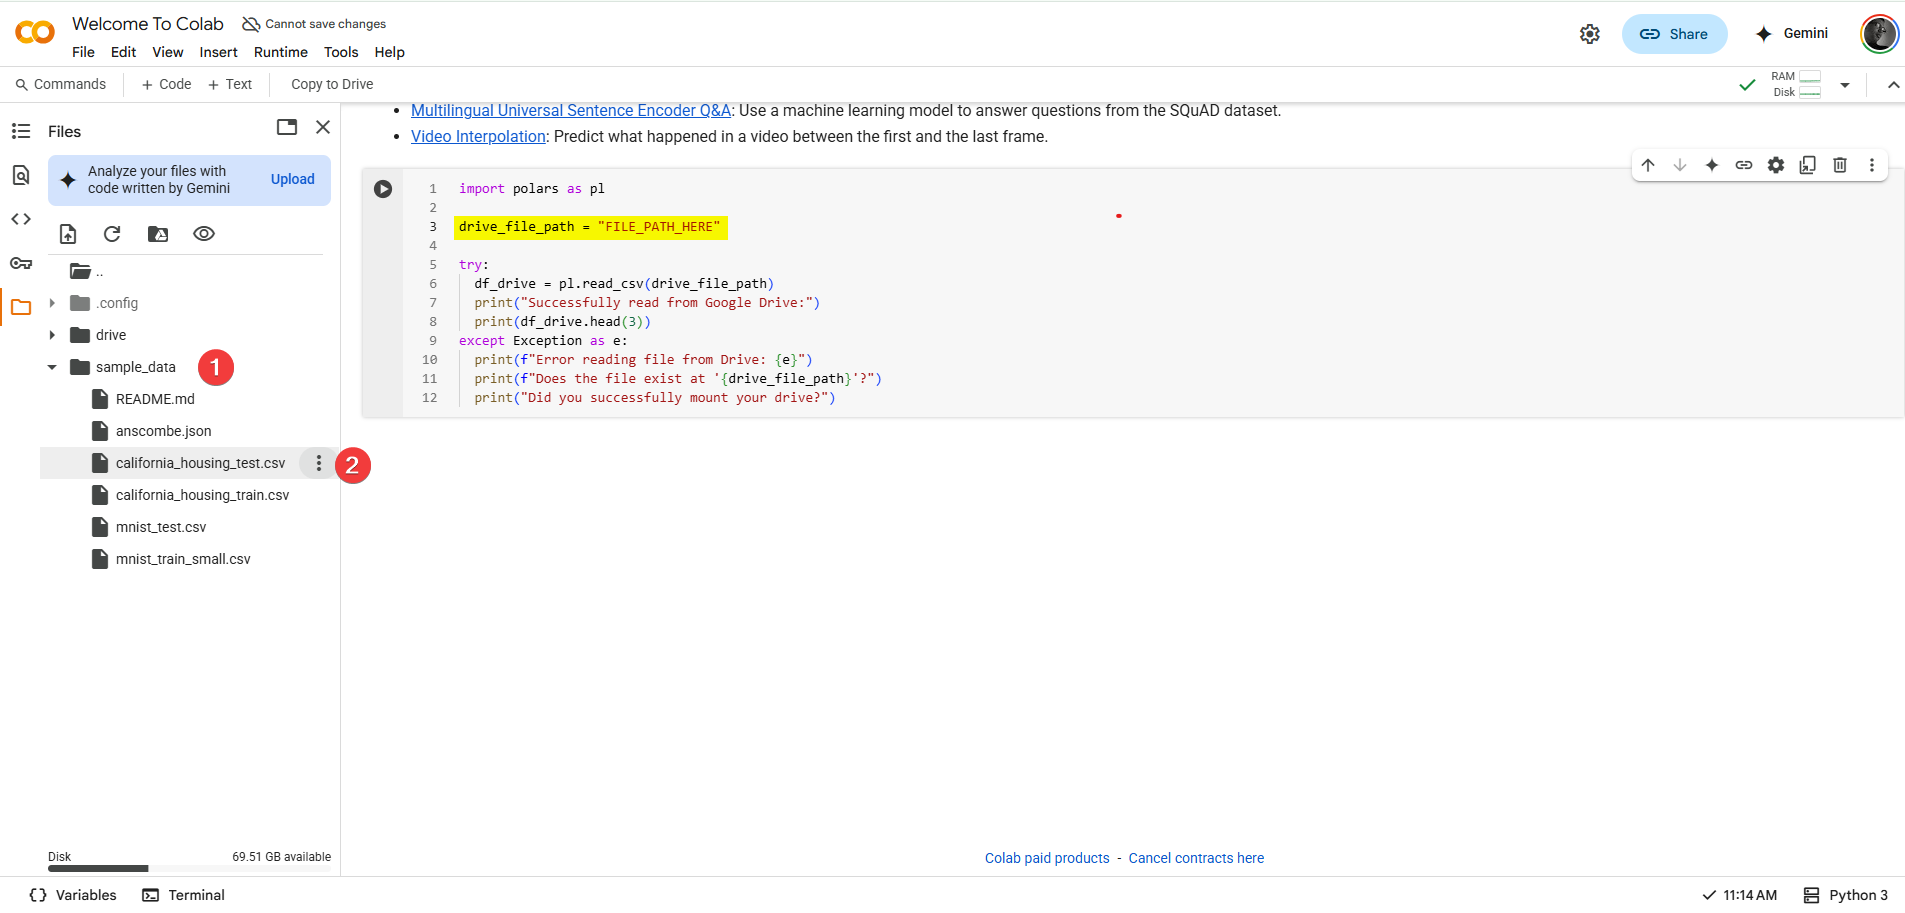
-
Right-click on the filename (or click the three vertical dots
⋮next to it) .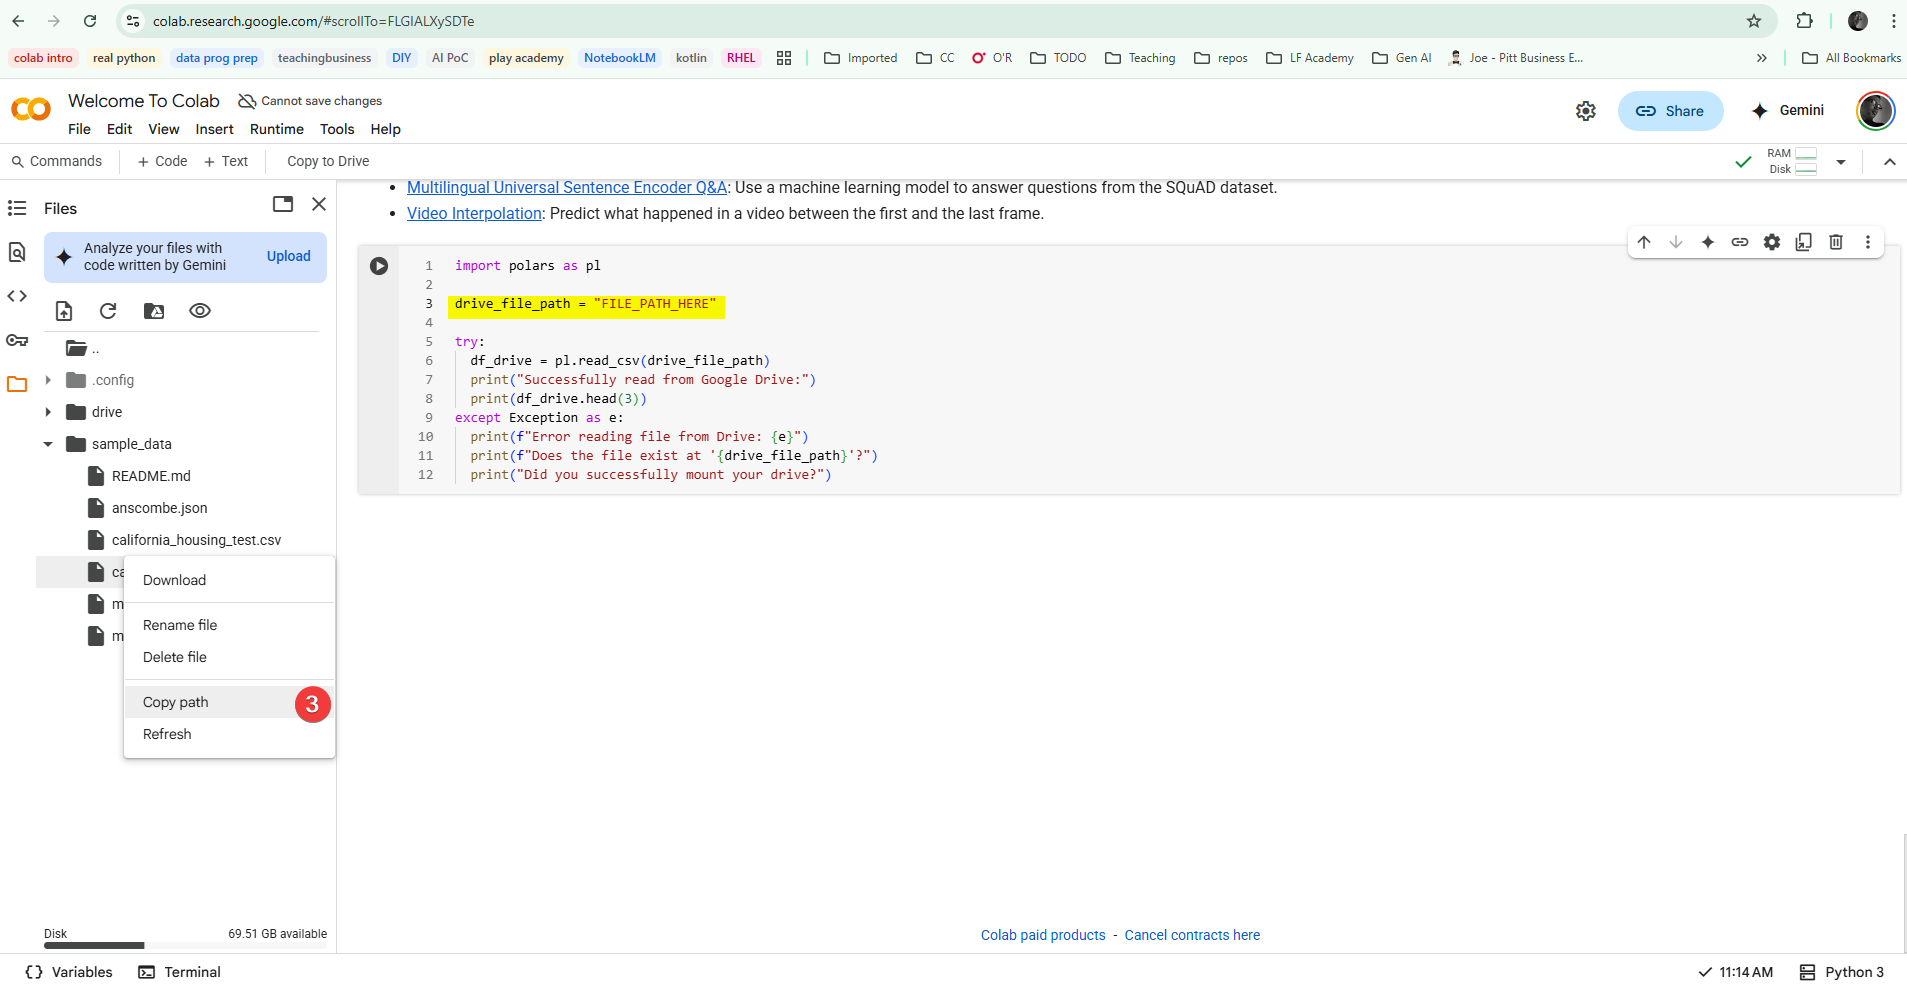
-
From the menu that appears, select "Copy path" .
-
Now, go to your code cell and paste (
Ctrl+VorCmd+V) the copied path directly into your code where the filename/path is needed (e.g., insidepl.read_csv('PASTED_PATH_HERE')).
This "Copy path" feature helps ensure you have the exact, correct path, preventing FileNotFoundError issues due to typos.