Going Deeper (Optional Exploration)
You've now covered all the essential Colab features needed to succeed in this course! This final section explores a few additional tools and concepts. These are optional – you don't strictly need them for your assignments – but learning them can make your workflow faster, more efficient, or help you understand the Colab environment more thoroughly.
Useful Keyboard Shortcuts
While Colab's menus and toolbars are user-friendly, using keyboard shortcuts is often much faster once you learn a few key combinations. This can significantly speed up writing and manipulating your notebooks.
Command Mode vs. Edit Mode: A key concept for shortcuts is understanding Colab's (and Jupyter's) modes:
- Edit Mode: You're actively typing inside a cell (usually indicated by a green border around the cell and a blinking cursor). Keystrokes insert text or code.
- Command Mode: You've selected a cell but aren't typing inside it (usually indicated by a blue border). Keystrokes act as commands on the cell itself (like deleting it, changing its type, etc.).
- Press the <prefix> key combo, Ctrl+M or Esc,to switch from Edit Mode to Command Mode.
- Press
Enter(or click inside a cell) to switch from Command Mode to Edit Mode.
Some Highly Useful Shortcuts:
(Remember to be in the correct mode - usually Command Mode unless otherwise specified)
- Essential Execution:
Shift + Enter: Run current cell, select cell below (works in both modes).Ctrl + Enter(Cmd + Enteron Mac): Run selected cell(s), keep focus here (works in both modes).Alt + Enter(Option + Enteron Mac): Run current cell, insert new code cell below (works in both modes).
- Cell Manipulation (Command Mode):
A: Insert new code cell Above current cell.B: Insert new code cell Below current cell.D,D(pressDtwice quickly): Delete selected cell(s) (use with care!).M: Change cell type to Markdown (Text).Y: Change cell type back to code (Y not intuitive, just is).Z: Undo last cell operation (like delete).Shift + M: Merge selected cells (select multiple withShift + Up/Down Arrowfirst).
- Editing (Edit Mode):
Ctrl + /(Cmd + /on Mac): Comment or uncomment the selected line(s) of code with#.
Discover More: This is just a small sample! To see the full list of available shortcuts and even customize them, go to the main menu: Tools -> Keyboard shortcuts. Learning just a few common ones can make a noticeable difference in your speed.
Code Snippets
Colab includes a library of pre-written code snippets for common tasks, which can save you time and help you discover functionalities.
- How to Access: In the Left Sidebar, click the Code Snippets icon (often looks like
< >). - Browse & Insert: A pane will open with searchable snippets, often categorized (e.g., "Visualization", "Importing data") . Find a snippet you need (like "Mount Google Drive" or examples for plotting libraries) and click the "Insert" button (or sometimes just click the snippet). The necessary code cell(s) will be added to your notebook.
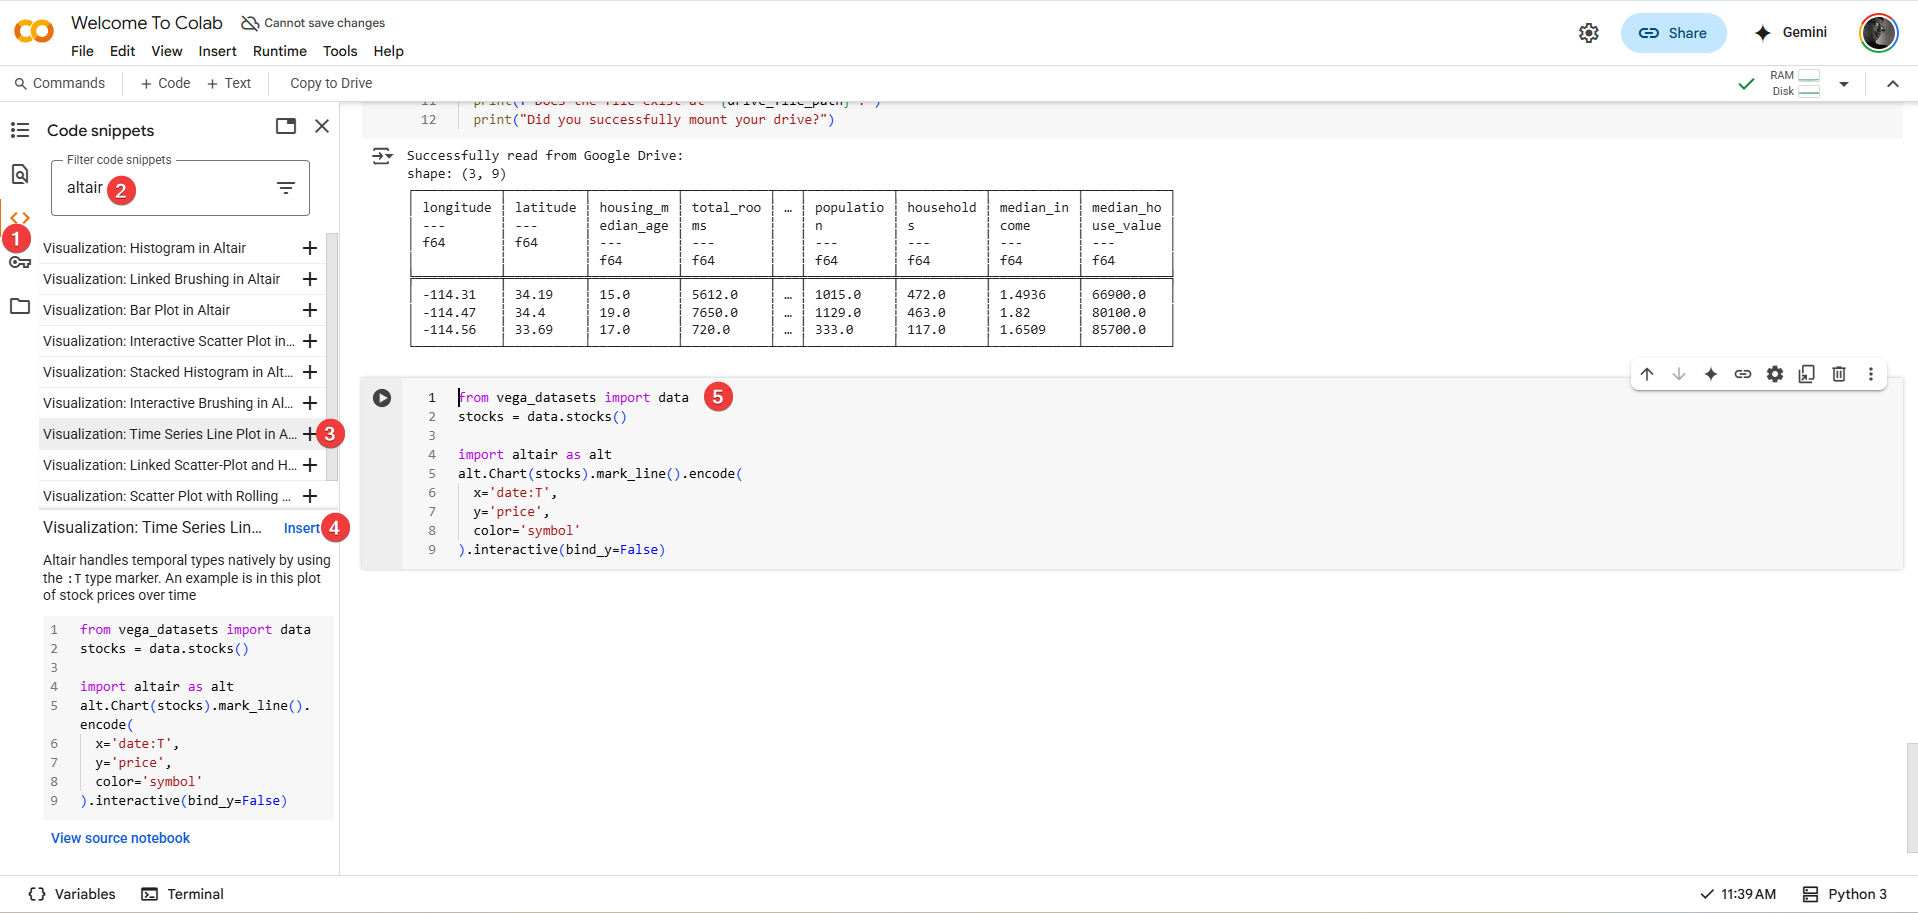
- Usefulness: Great for boilerplate code (like Drive mounting), exploring examples (especially for visualizations), or finding code for interacting with specific Google services.
The Command Palette
If you can't remember a keyboard shortcut or where a command is hidden in the menus, the Command Palette is a powerful search tool for actions.
- How to Access: Use the toolbar or press
Ctrl + Shift + P(orCmd + Shift + Pon Mac). -
Search & Execute: A search bar pops up. Start typing the name of the action you want (e.g., "markdown", "restart", "clear all", "table of contents"). The list filters as you type. Select the desired command using arrow keys and
Enter, or click it .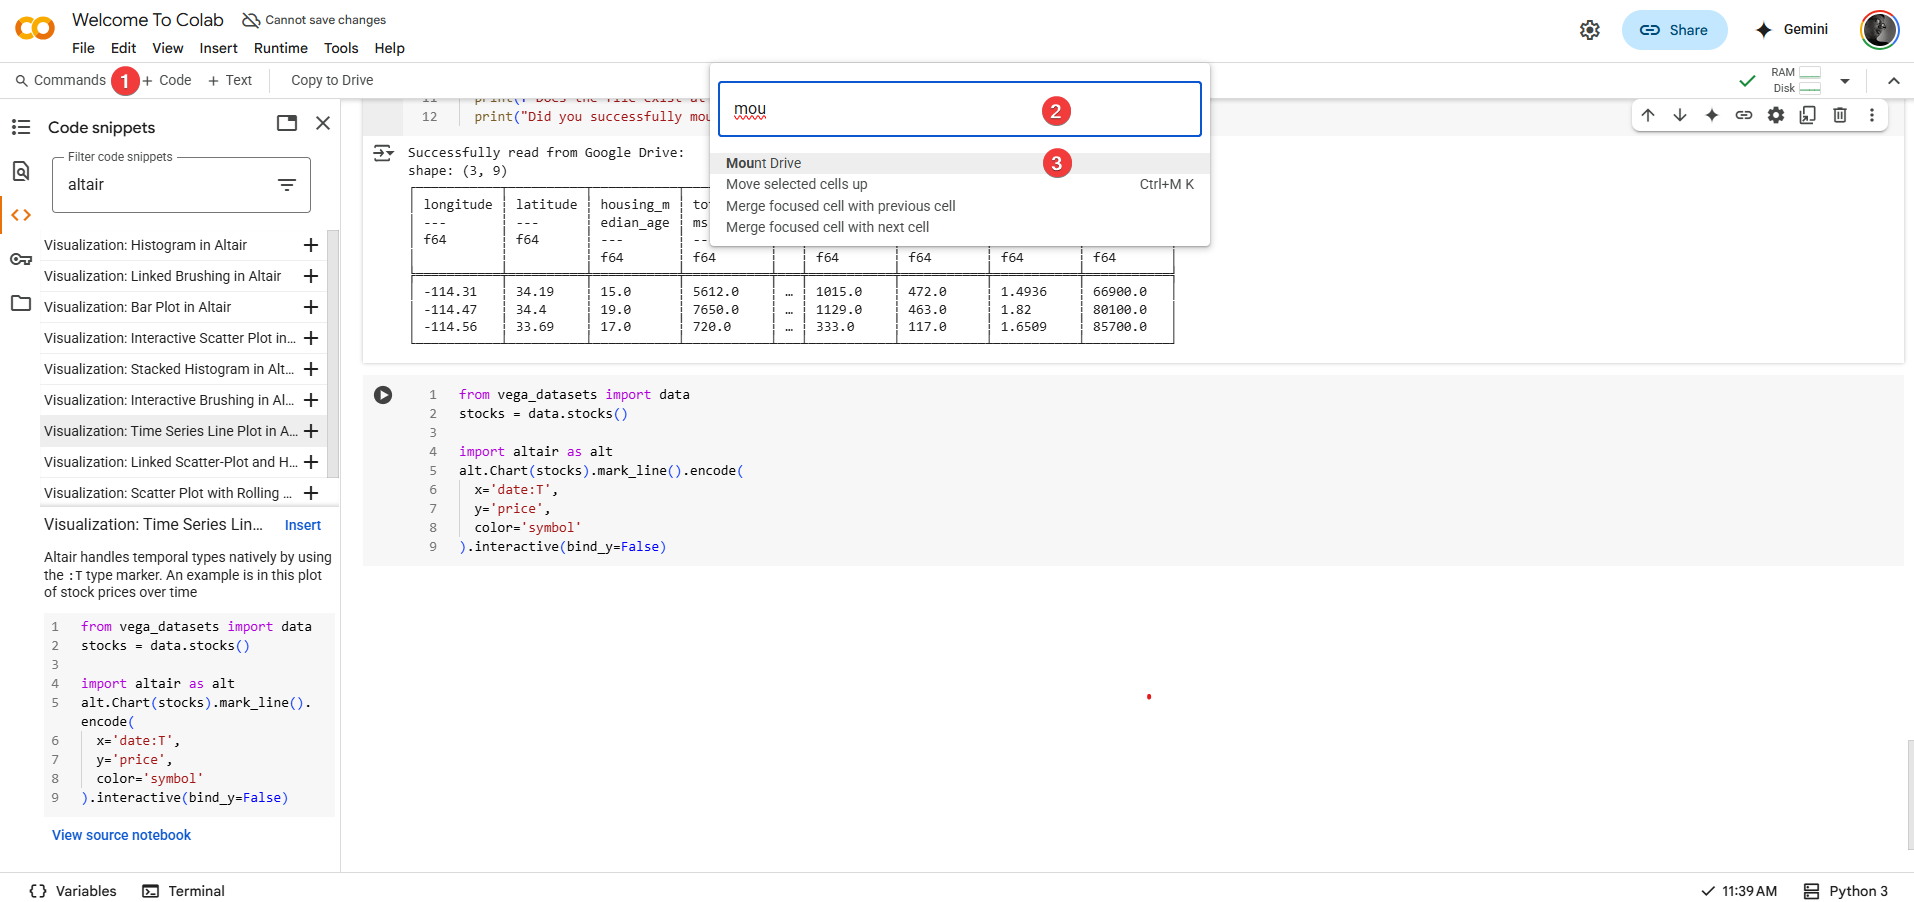
-
Benefit: Allows quick keyboard access to virtually any Colab command without needing to memorize everything.
Understanding Resource Limits
While Colab's free tier is generous, it's not infinite. Knowing the limitations helps prevent unexpected interruptions.
- Key Limits:
- Session Timeouts: Your connection to the Colab backend (the Kernel) isn't permanent. It will disconnect after a certain period of inactivity (often 30-90 minutes) or after reaching a maximum total runtime (which can be around 12 hours, but varies).
- RAM (Memory): You get a significant amount of RAM (~12GB generally), but loading extremely large datasets or performing very complex calculations can exceed this, potentially crashing your session.
- Disk Space: The temporary session storage (where direct uploads go) is also limited.
- GPU/TPU: Access to specialized hardware (which we generally won't need for this course) is also restricted in time and availability.
- Consequences of Limits/Timeouts: When your session ends (due to timeout or crash), the Kernel state is lost. This means:
- All variables and loaded data in memory disappear.
- Any files uploaded to temporary session storage are deleted.
- Custom installed packages (
!pip install) are removed. - You will need to reconnect and re-run your initialization cells (imports, Drive mount, installs, data loading).
- Working Within Limits:
- Use Google Drive for persistent storage of notebooks and data (Section 4.3).
- Develop the habit of structuring your notebooks so initialization steps are easy to re-run.
- Use
Restart and run all(Section 3.4) periodically to ensure your workflow is robust.
- Paid Options: Google offers Colab Pro/Pro+ with extended runtimes and more resources, but these are not necessary for completing this course successfully.